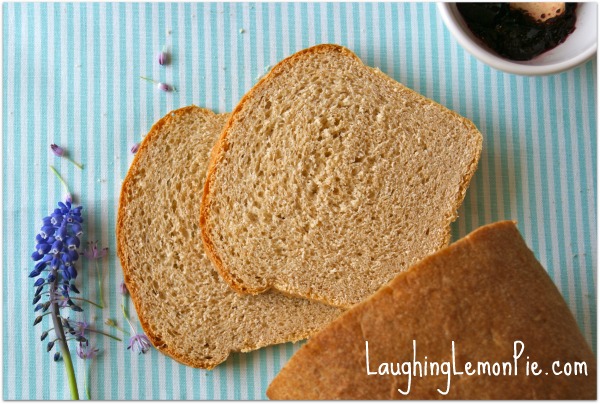
OMG! I’m so excited! It’s my first-ever VIDEO BLOG!
When I was writing my e-book, The Ultimate Guide to Eating Organic on a Budget, I included some of my favorite DIY recipes for things like crock pot beans, easy tomato sauce, and sandwich bread.
It took me years—literally, years—to figure out the techniques and find a bread recipe that would work for me every time, without fail. And I realized that just giving you guys the recipe wasn’t enough; I really needed to invite you all over and show you how to do it.
Well, I couldn’t do that. But I realized that what I could do was videotape myself doing it! So I did!
So, in a nutshell, I say the word “so” WAY too much. But I guess it’s better than um. Um….
In case you missed it…
3 game-changing tips for baking your own sandwich bread:
- Weigh your flour. You can get great digital scales, like this Escali 11-lb. Primo Digital Scale for very little money these days, and weighing the flour will make a huge difference in your baking.
- Do the windowpane test to make sure you’ve kneaded your bread enough.
- Use a dough doubling bucket for the perfect rise.
| Organic Light Wheat Sandwich Bread |
- 11.25 oz unbleached high-gluten or bread flour
- 6.75 oz. whole-wheat flour
- 1 1/2 tablespoons granulated sugar or honey
- 1 1/2 teaspoons salt
- 3 tablespoons powdered milk
- 1 1/2 teaspoons instant yeast
- 2 tablespoons shortening or unsalted butter, at room temperature
- 1 1/4 cups water, at room temperature, plus 1-2 tablespoons
- Stir together the dry ingredients in the bowl of your mixer. Add the shortening or butter (and honey, if using). With the paddle attachment and the mixer running, slowly add the water, dribbling down the side of the bowl to get all the flour moist. Add more water if necessary and continue to mix until the dough pulls away from the bowl and forms a ball around the paddle.
- Switch to the hook attachment on the mixer and knead on medium speed for six minutes, or until the dough passes the windowpane test. Form dough into a ball and place in a lightly oiled bowl or dough bucket. Spray the top lightly with oil and cover. Allow to rise for one and a half to two hours, until doubled in size.
- Press the dough into a rectangle about six inches wide and 12 to 18 inches long. Roll the dough up, pinching the seam with each roll and pinching the final seam closed. Spray a standard loaf pan with oil and put the rolled dough in, seam-side down. Cover loosely with plastic wrap and allow to rise again for one and a half to two hours.
- Preheat the oven to 350 degrees. When the dough has risen, uncover and bake for 30 minutes. Rotate the pan 180 degrees for even browning and bake for an additional 10 minutes.
- Remove the bread from the oven and remove the bread from the pan as soon as possible. Allow to cool completely on a cooling rack before slicing.
- Yields one two-pound loaf
If you’d like more tips and recipes like this one, you can get much more in my e-book.


Have only made it through about half of the video but what a great idea! I will finish it later and enjoy it I know. And what a pleasure to SEE you this AM when I came to the site….Never heard of the windowpane test. Another thing I’ve learned from you. Thanks – and do more videos please.
Lacy…what a fun video. I’ve been thinking about making my own bread for a while now and just haven’t had a confidence. These tips will certainly make it easier I’m sure :] Now I just gotta get a scale and a mixer :] Thanks for sharing!
You can also do it in a food processor if you have one. Some of them even have a special ‘dough’ setting. Or, you can do it by hand. You’re a strong lady! I bet you could do it!
I don’t have a scale right now to weight out the flour. About how many cups does your recipe come out too? Thanks.
Hi Mary,
It comes out to about 2.5 cups of bread flour and 1.5 cups of whole wheat flour. Let me know how it goes!
I love that rolling method for the dough! I started doing it after getting a KitchenAid mixer from my mom. We too live at altitude and I think the rolling helps a LOT with the altitude issues.
I think you’re right! Love my Kitchen Aid.
(To clarify, I started rolling after getting the KitchenAid because I was using the recipes in the little cookbook that came with the mixer.)
Thank you, thank you, thank you. I have tried different high altitude sandwich bread recipes with mediocre results. Yours worked great.
Hooray! I had the same problem originally. Glad this helped!